Connections
The catalogue of everything a project can connect to: channels, connectors, data sources and tools, each a card with its own setup.
On this page
Connections is the catalogue of everything a project can connect to: the channels your customers and team already talk on, the apps your agents may use on your behalf, outside data, and tools. Pick a card, press its +, and you land on that service's own setup.
Where to find it
Connections is the last of the main rows of level 1. Press Open in Kareenos above. It is a builder page, and the setup pages behind some cards (messaging, voice, connectors, payments) are for administrators.
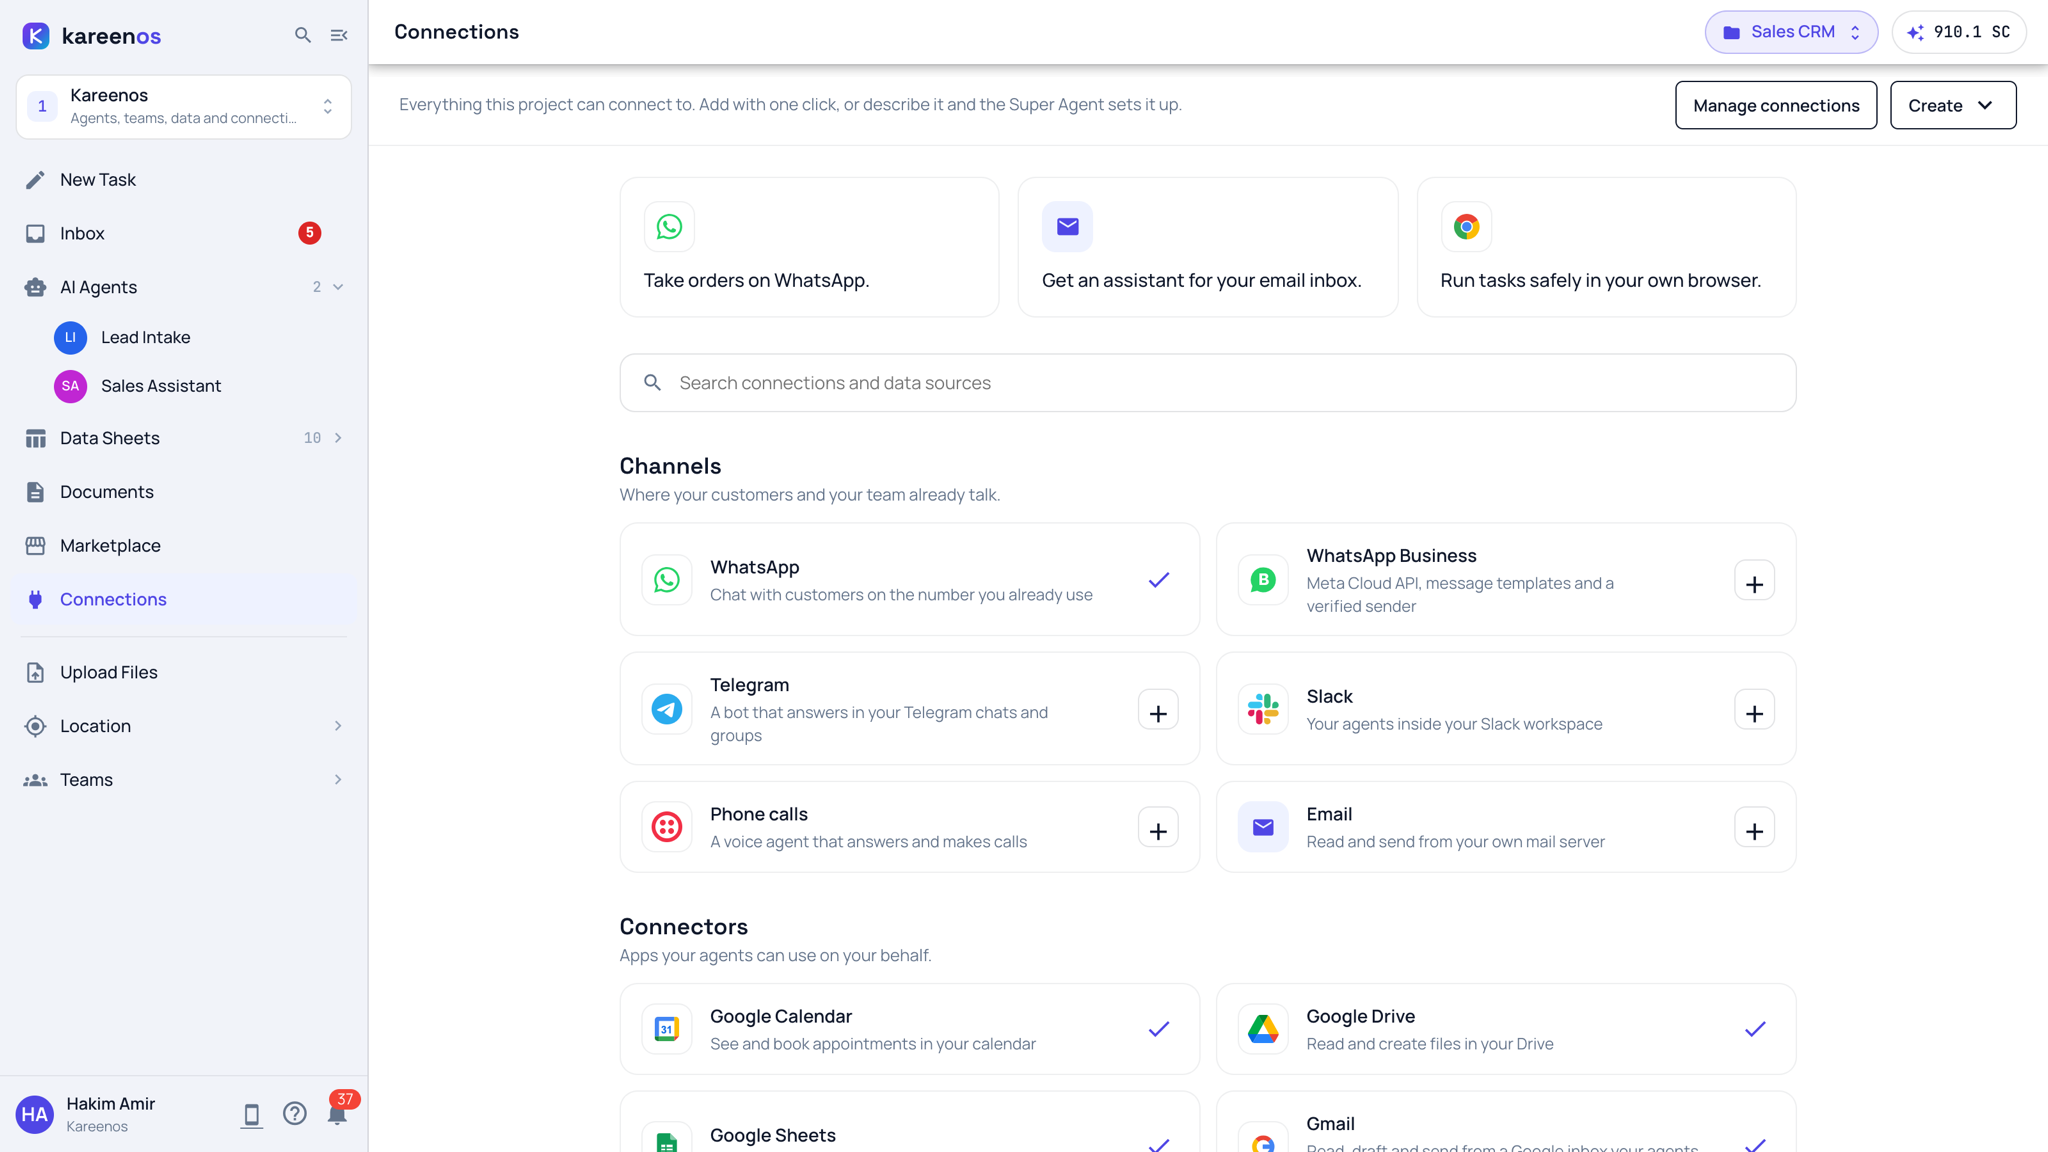
How the page is organised
Three featured cards sit at the top, then a search box, then four sections:
| Section | What is in it | Guides |
|---|---|---|
| Channels: where your customers and your team already talk | WhatsApp, WhatsApp Business, Telegram, Slack, Phone calls, Email | Messaging channels, Voice channels, Email servers |
| Connectors: apps your agents can use on your behalf | Google Calendar, Google Drive, Google Sheets, Gmail, Outlook and Microsoft 365, Buffer, GitHub, Stripe Payments, and Build a custom connector | Google and Microsoft accounts, Buffer and GitHub, Third-Party Integrations |
| Data sources: outside data, read-only, as live sheets | Excel and CSV files, Postgres, MySQL and SQL Server, REST and GraphQL APIs, and Build a custom data adaptor | Data Adaptors |
| Tools and events: more tools for agents, and a way in for other systems | MCP servers, Webhooks, Upload channels, Cloud Browser | MCP Servers, Upload Files, Cloud Browser |
Reading a card
- + opens the service's own setup page with its add dialog already open: the WhatsApp card opens the Add Channel form, the email card a new email profile, and so on. For Google and Microsoft the + links the account in one click, in the project of the top bar.
- A tick means the project is already connected.
- Finish setup appears on a payment connection that is not finished yet, and continues where you stopped.
- The sparkle beside the + (on a touch screen it is always shown) asks the Super Agent to set the card up for you instead: New Task opens with the sentence ready to send.
- The two wide Build a custom cards are built by the Super Agent, for a system nobody has a ready card for.
Step by step: connecting your first channel
- Check the project in the top bar: every connection belongs to one project.
- Open Connections and find the card, or type its name in the search box.
- Press +. The setup page opens with its form ready; follow the guide for that service, linked in the table above.
- Back on Connections, the card now shows a tick.
- Send one test message, email or call through the new connection before you rely on it.
Manage connections and Create
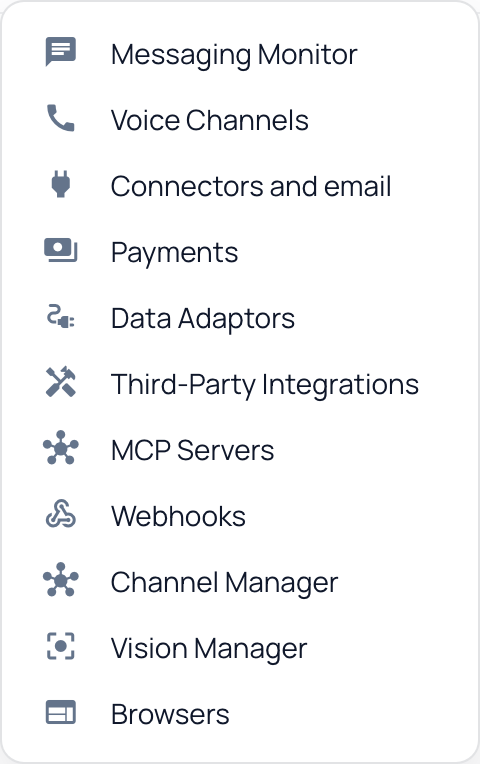
Manage connections at the top right lists every setup page behind the cards, for when you want to change or remove something that already exists. Create starts a custom connector or a custom data adaptor with the Super Agent.
Careful
Never paste a key, a token or a password into a chat with an agent, even if it asks. Credentials belong on the setup pages, where they are stored once and never shown back.
Common mistakes
- Connecting in the wrong project, so the channel works but no agent of this project is listening.
- Stopping at the tick. A connection is only proven by one real test message.
- Asking the Super Agent to "connect WhatsApp" and expecting it to scan the code. Pairing a phone, approving a consent screen and pasting a key are things only you can do.