Google and Microsoft accounts
Register your organization's own Google and Microsoft app, then let each person link their own mailbox, calendar and files.
On this page
Linking a Google or Microsoft account lets an agent work inside somebody's real mailbox: reading mail, sending replies, and for Google also reading a calendar, dropping a file in Drive or appending to a Sheet. It happens in two stages, and they must happen in that order.
Stage one is an administrator registering your organization's own app with Google or Microsoft. Stage two is each person connecting their own account through that app. Until stage one is done, the provider is greyed out in the Add Account dialog and nobody can link anything.
Where to find it
Press Open in Kareenos above to open the Connectors tab. Stage one is the OAuth Apps section (administrators only); stage two is the Linked Accounts section at the bottom of the same tab, which any member with access to Settings can use for their own account.
Why you register your own app
Your organization uses its own Google Cloud project and its own Microsoft app registration rather than a shared one. That means the consent screen your people see carries your name, the access sits inside your own cloud account where your administrators can review or revoke it, and nothing about your mailboxes passes through anybody else's app. It is a one time job for an administrator and it is the reason the rest of this works.
Stage one, Google
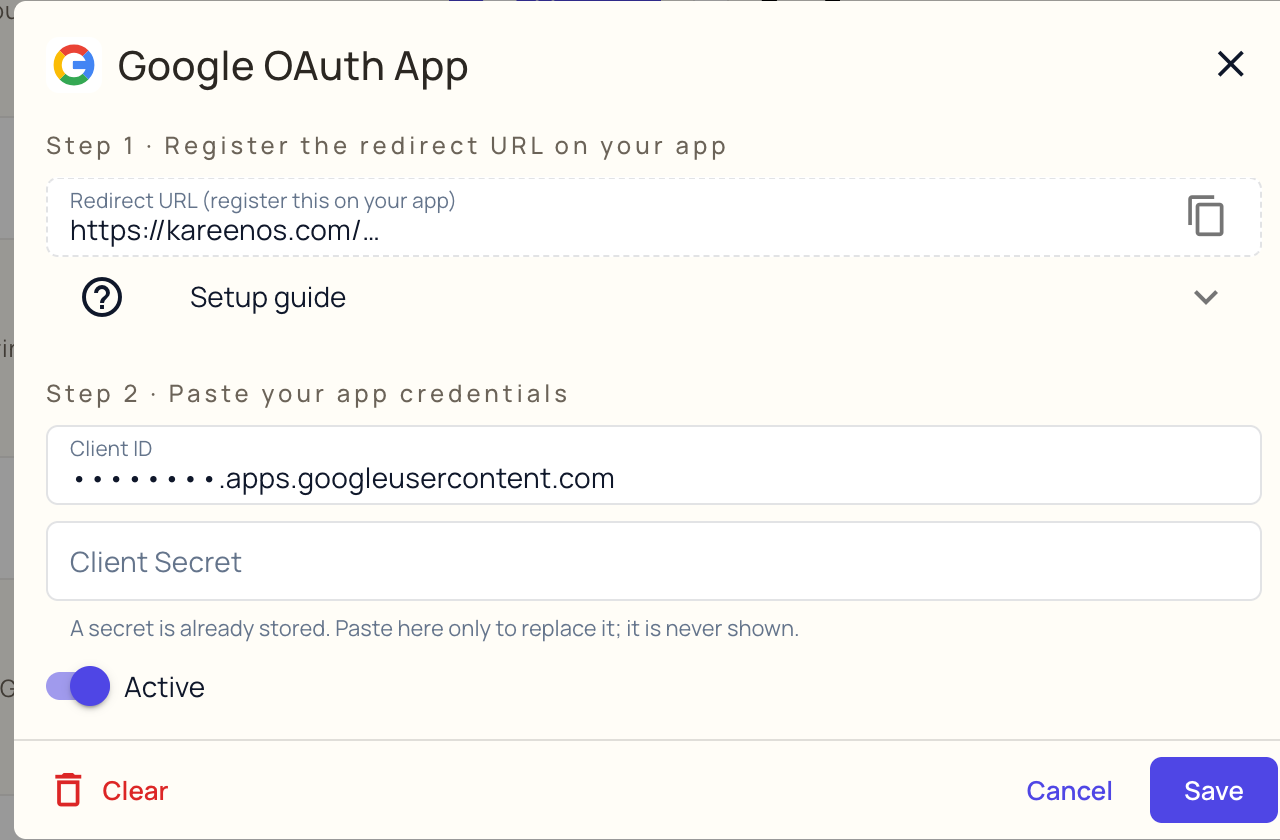
Open Connectors and press Set up on the Google OAuth App card.
At the top of the dialog is a read only Redirect URL. Press the copy button beside it. Do not retype it. It has to match on both sides exactly, and a typed copy is the single most common reason linking fails later.
Open the Google Cloud console credentials page, in your own Google Cloud project.
Choose Create Credentials, then OAuth client ID, then application type Web application.
Paste the Redirect URL into Authorized redirect URIs.
Under APIs and Services, then Library, enable the services your agents will actually use: Gmail API, Google Calendar API, Google Drive API, Google Sheets API.
Configure the OAuth consent screen, choosing External.
Copy the Client ID and Client Secret back into the dialog, leave Active on, and press Save.
Important
While your consent screen is in Testing, only people you have explicitly added as test users can link an account. Everyone else is refused at Google's own screen, which looks like a Kareenos problem and is not. Either add each colleague as a test user, or publish the app and complete Google's verification.
Stage one, Microsoft
Open Connectors and press Set up on the Microsoft OAuth App card.
Copy the Redirect URL with the copy button, the same as above. The dialog's own Setup guide repeats the steps below.
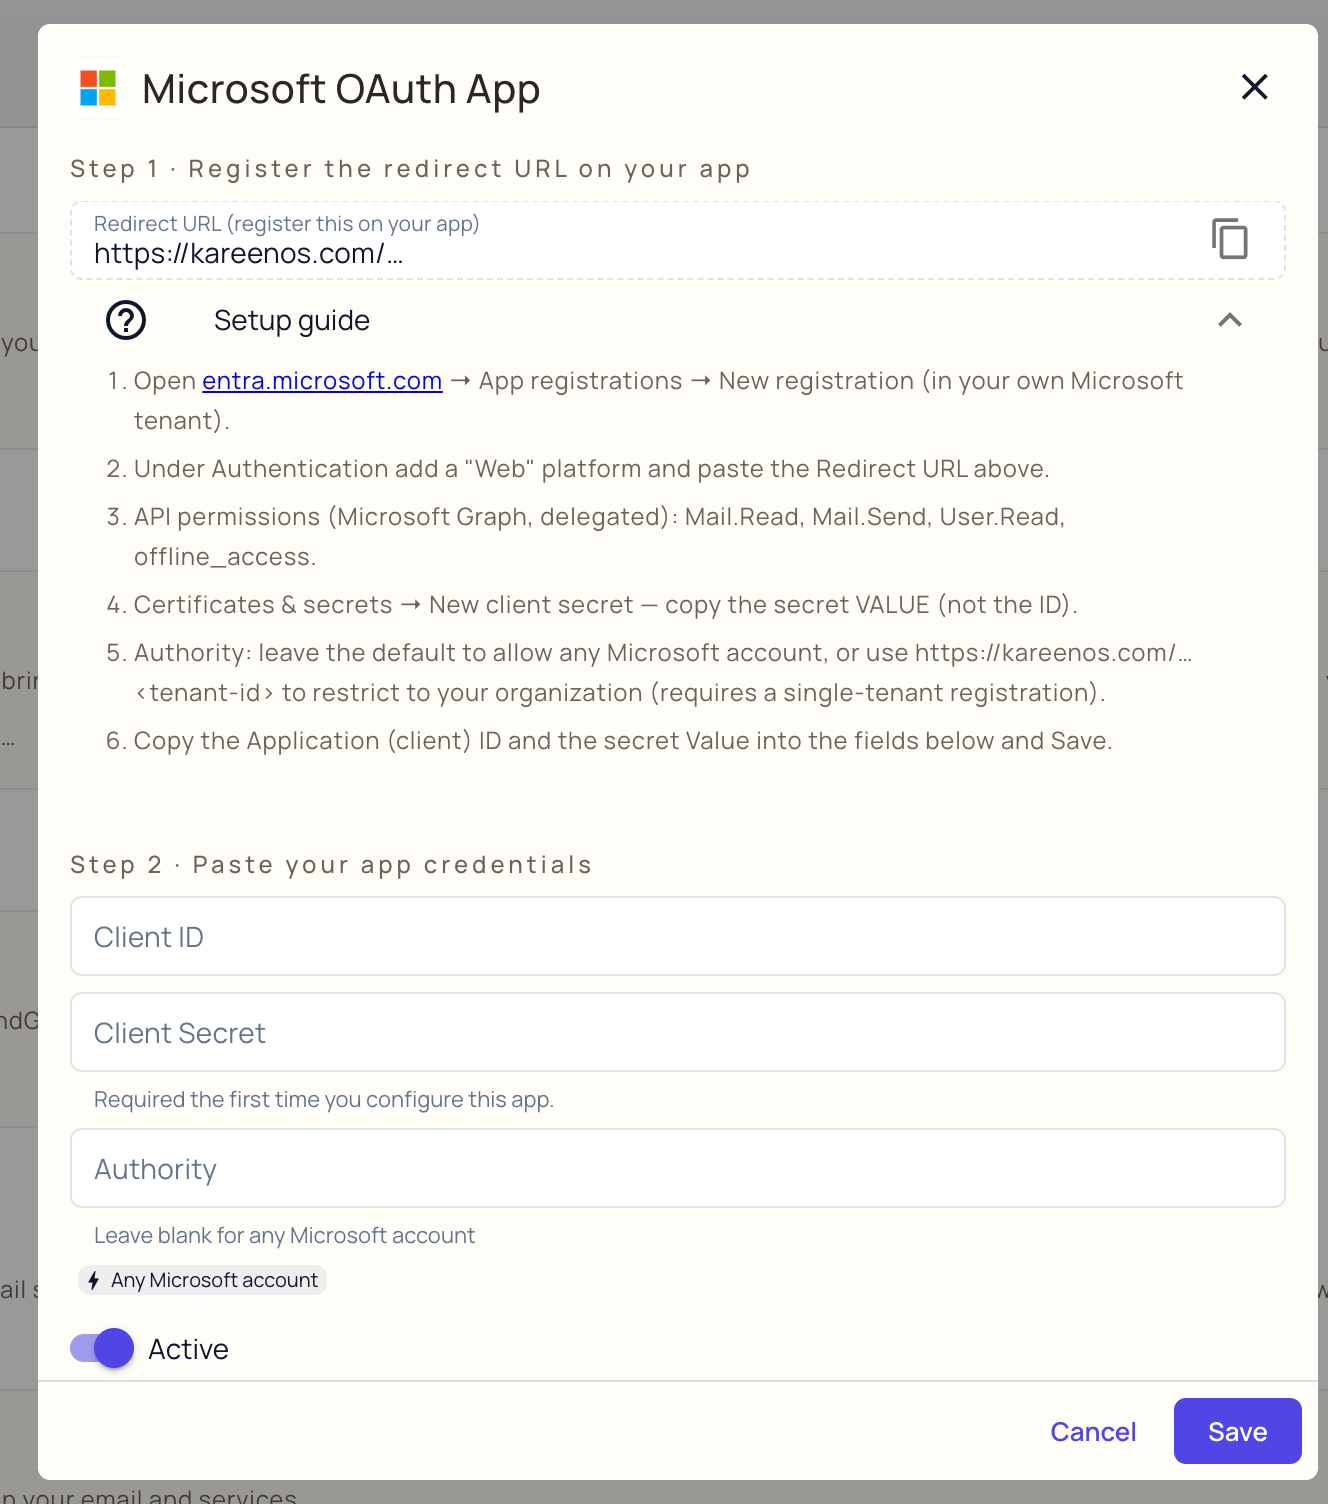
Open the Microsoft Entra admin center, go to App registrations and choose New registration, in your own Microsoft tenant.
Under Authentication, add a platform of type Web and paste the Redirect URL.
Under API permissions, add these delegated Microsoft Graph permissions: Mail.Read, Mail.Send, User.Read and offline_access.
Under Certificates and secrets, choose New client secret. Copy the secret Value, not the Secret ID. The Value is only shown once and the two are easy to confuse.
Back in the dialog, paste the Application (client) ID and the secret Value.
Leave Authority blank to allow any Microsoft account to link, or set it to your own tenant to restrict linking to your organization. Restricting it requires a single tenant registration.
Leave Active on and press Save.
Stage two, linking an account
Once the app is set up and active, anyone can link their own account from the Linked Accounts section at the bottom of the same tab.
Press Add Account.
Choose the Project. Every linked account belongs to one, and only agents in that project can use it.
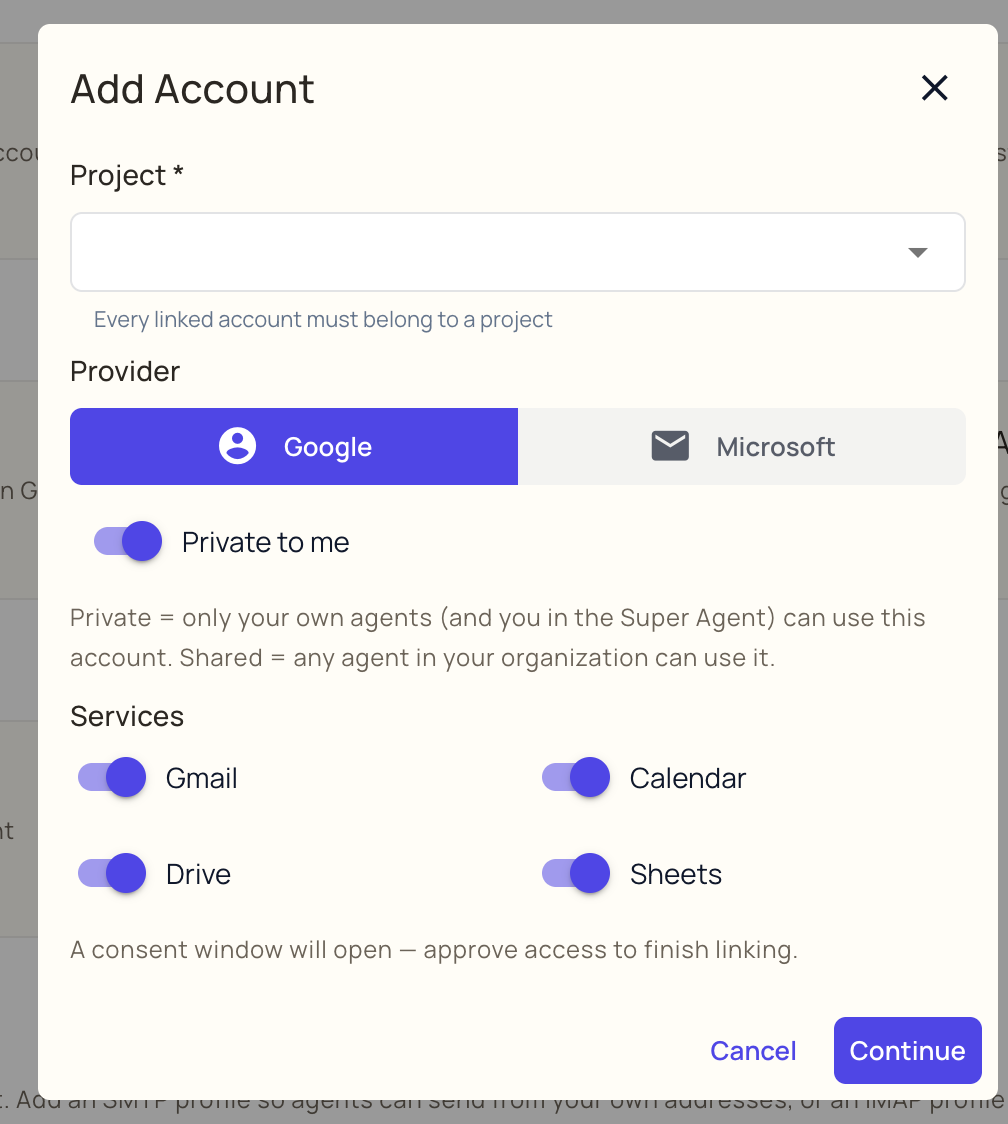
Choose Google or Microsoft. A greyed out provider means stage one has not been done for it yet.
For Google, choose which services to allow: Gmail, Calendar, Drive, Sheets. Turn off anything the agents do not need. For Microsoft, linking connects Outlook mail for reading and sending.
Decide Private to me or shared. Private means only your own agents, and you in the Super Agent, can use the account. Shared means any agent in your organization can. If the project itself is private, the link is forced to private too.
Press Continue. A window opens on the provider's own sign in and consent screen. Approve it there and the window closes on its own.
The link then appears in the list with the provider, the services it covers and whether it is private or shared.
Watching a linked mailbox for new mail
Each mail capable link has an Auto-sync email toggle and an interval in minutes. Switch it on and agents are woken when new mail arrives in that mailbox, the same way an IMAP profile works for a company mail server. Leave it off if you only want agents to read or send when asked.
Unlinking
Press the unlink button on the row. Agents immediately lose access to that account's services, and anything that depended on it starts reporting the account as unavailable. Relinking is the same three clicks, so unlinking to test something is safe.
Nobody else can unlink your private account for you, and a shared link is worth agreeing on before removing, since other people's agents may be using it.
Common mistakes
- Typing the Redirect URL instead of copying it. It has to match character for character.
- Copying the Microsoft secret ID instead of the secret Value.
- Registering the app and stopping there. The app on its own gives nobody access to any mailbox.
- Leaving the Google consent screen in Testing and forgetting to add colleagues as test users.
- Linking a personal mailbox for a company function. When that person leaves, every agent that relied on it stops. For a shared company address, use an email profile instead.