Live Workbooks
Your data, spreadsheet-shaped. Sheets, typed columns and five ways to look at the same rows.
On this page
A Live Workbook is where your operational data lives. Everything else in Kareenos reads from it and writes back to it.
Where to find it
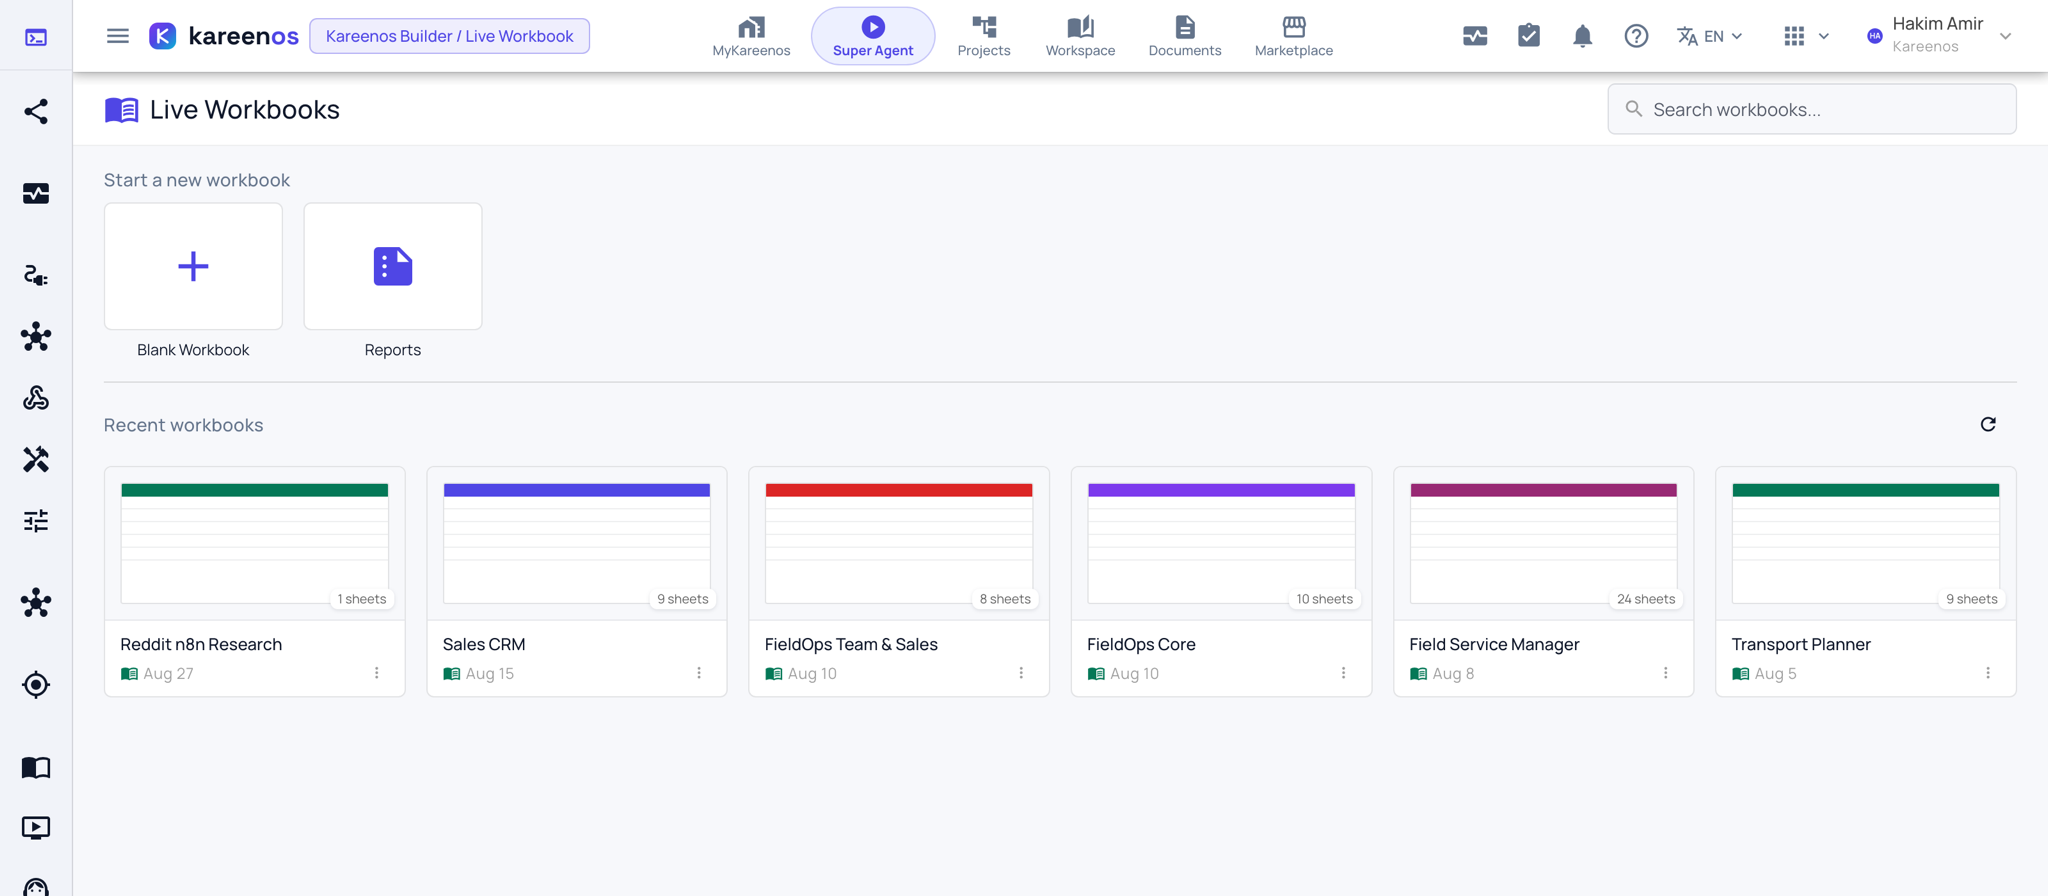
Press Open in Kareenos above, or open the left menu and choose Workspace, Live Workbook. Members also reach their workbooks from the Live Workbooks group at the bottom of the Workspace drawer. Anyone in a Team that has been granted the project can open them; editing rows follows the same access.
Workbooks, sheets, columns, rows
A workbook contains Sheets. A sheet has columns and rows, much like a spreadsheet, but each column has a declared type so the platform knows what the data means:
text, number, date, yes/no, dropdown, lookup to a row in another sheet, formula, map location, street address with autocomplete, uploaded file, QR code and barcode.
Typed columns are what let a map show your stops, a calendar show your bookings and an agent understand which value is a price.
Five ways to see the same sheet
The same rows can be viewed as a grid, a calendar, a kanban board, a form, or a map. You are not copying data between views, you are looking at one sheet through a different lens. The switcher is the row of view buttons at the top right of every sheet.
What else lives in a workbook
- Excel import: bring an existing spreadsheet in as a starting point.
- Jobs menu: run the jobs assigned to a sheet from one click in the toolbar.
- Widget views: dashboard tabs that live inside the workbook itself.
- Live collaboration: several people can edit at once and see each other's changes as they happen.
Step by step: opening a sheet and entering data
Open Live Workbooks and click a workbook card, or press Blank Workbook to start a new one.
Choose a sheet from the tabs across the top. The grid opens with one lettered column per field; a red mark on a column name means it is required.
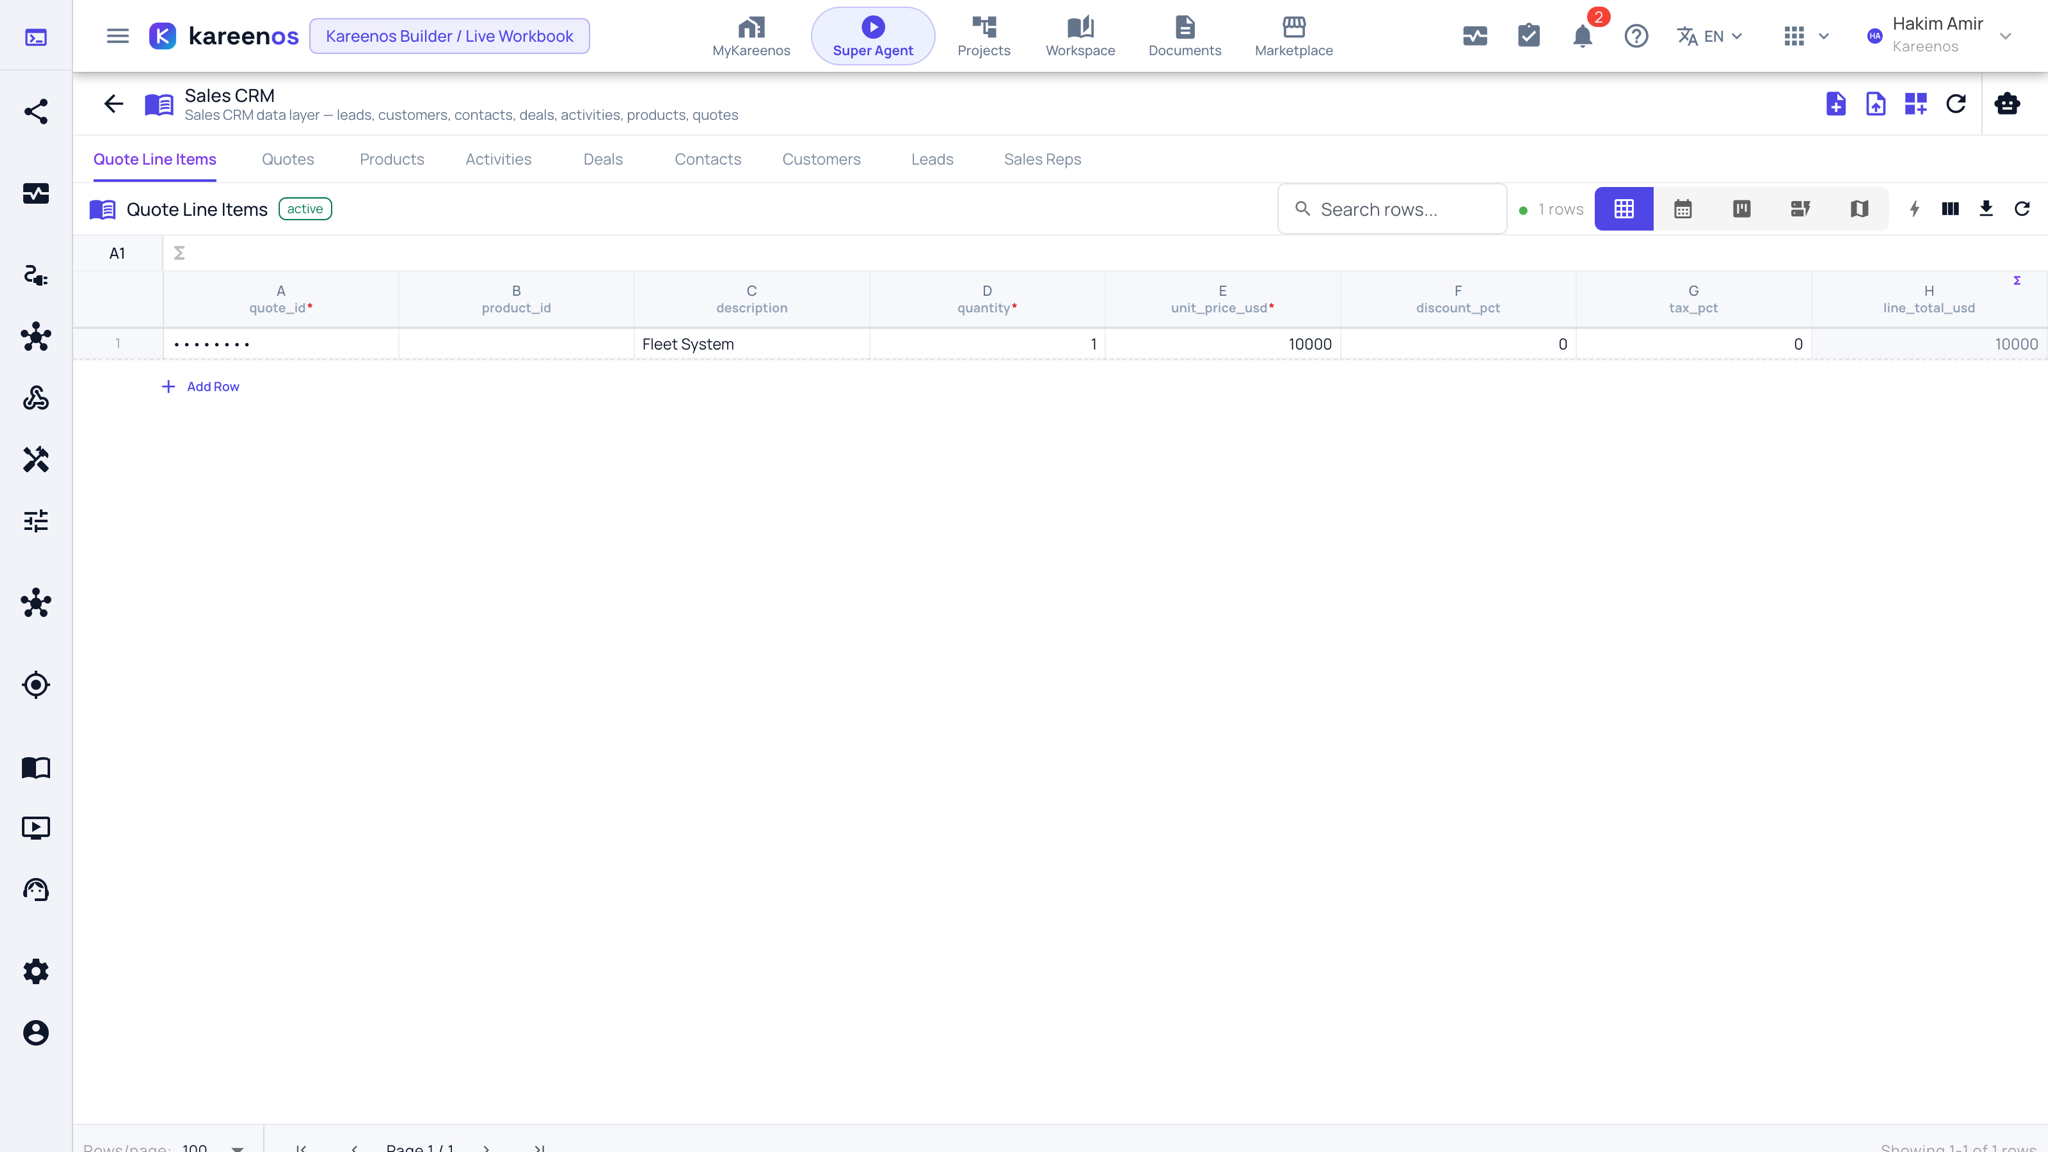
Press Add Row and fill in the cells. A new row is a draft on your screen until every required cell is valid; only then is it saved and visible to others.
Switch the view with the buttons at the top right: grid, calendar, kanban, form or map. Check the data reads well in each view your team will use.
To add a column, open the column header menu, choose the type deliberately, and mark it required if it must always be filled.
Point your Pages and agents at the sheet, or ask the Super Agent to do it for you.
Careful
Required columns are enforced on every write, by people and by agents alike. A new row in the grid is a draft on your screen until it is valid, so it is not saved and is not visible to anyone else yet.
Common mistakes
- Typing addresses or coordinates into a plain text column, which leaves them off the map.
- Repeating the same list in two sheets instead of using a lookup column.
- Marking everything required, which blocks partial data capture in the field.