Quick start: your first task
Pick a project, describe your operation in New Task, answer one form, approve one plan, and the Super Agent builds it.
On this page
This is the main path into Kareenos: you describe your operation in a paragraph, answer one form, approve one plan, and the Super Agent builds it, with agents, data sheets, automations and connections wired together.
Where to find it
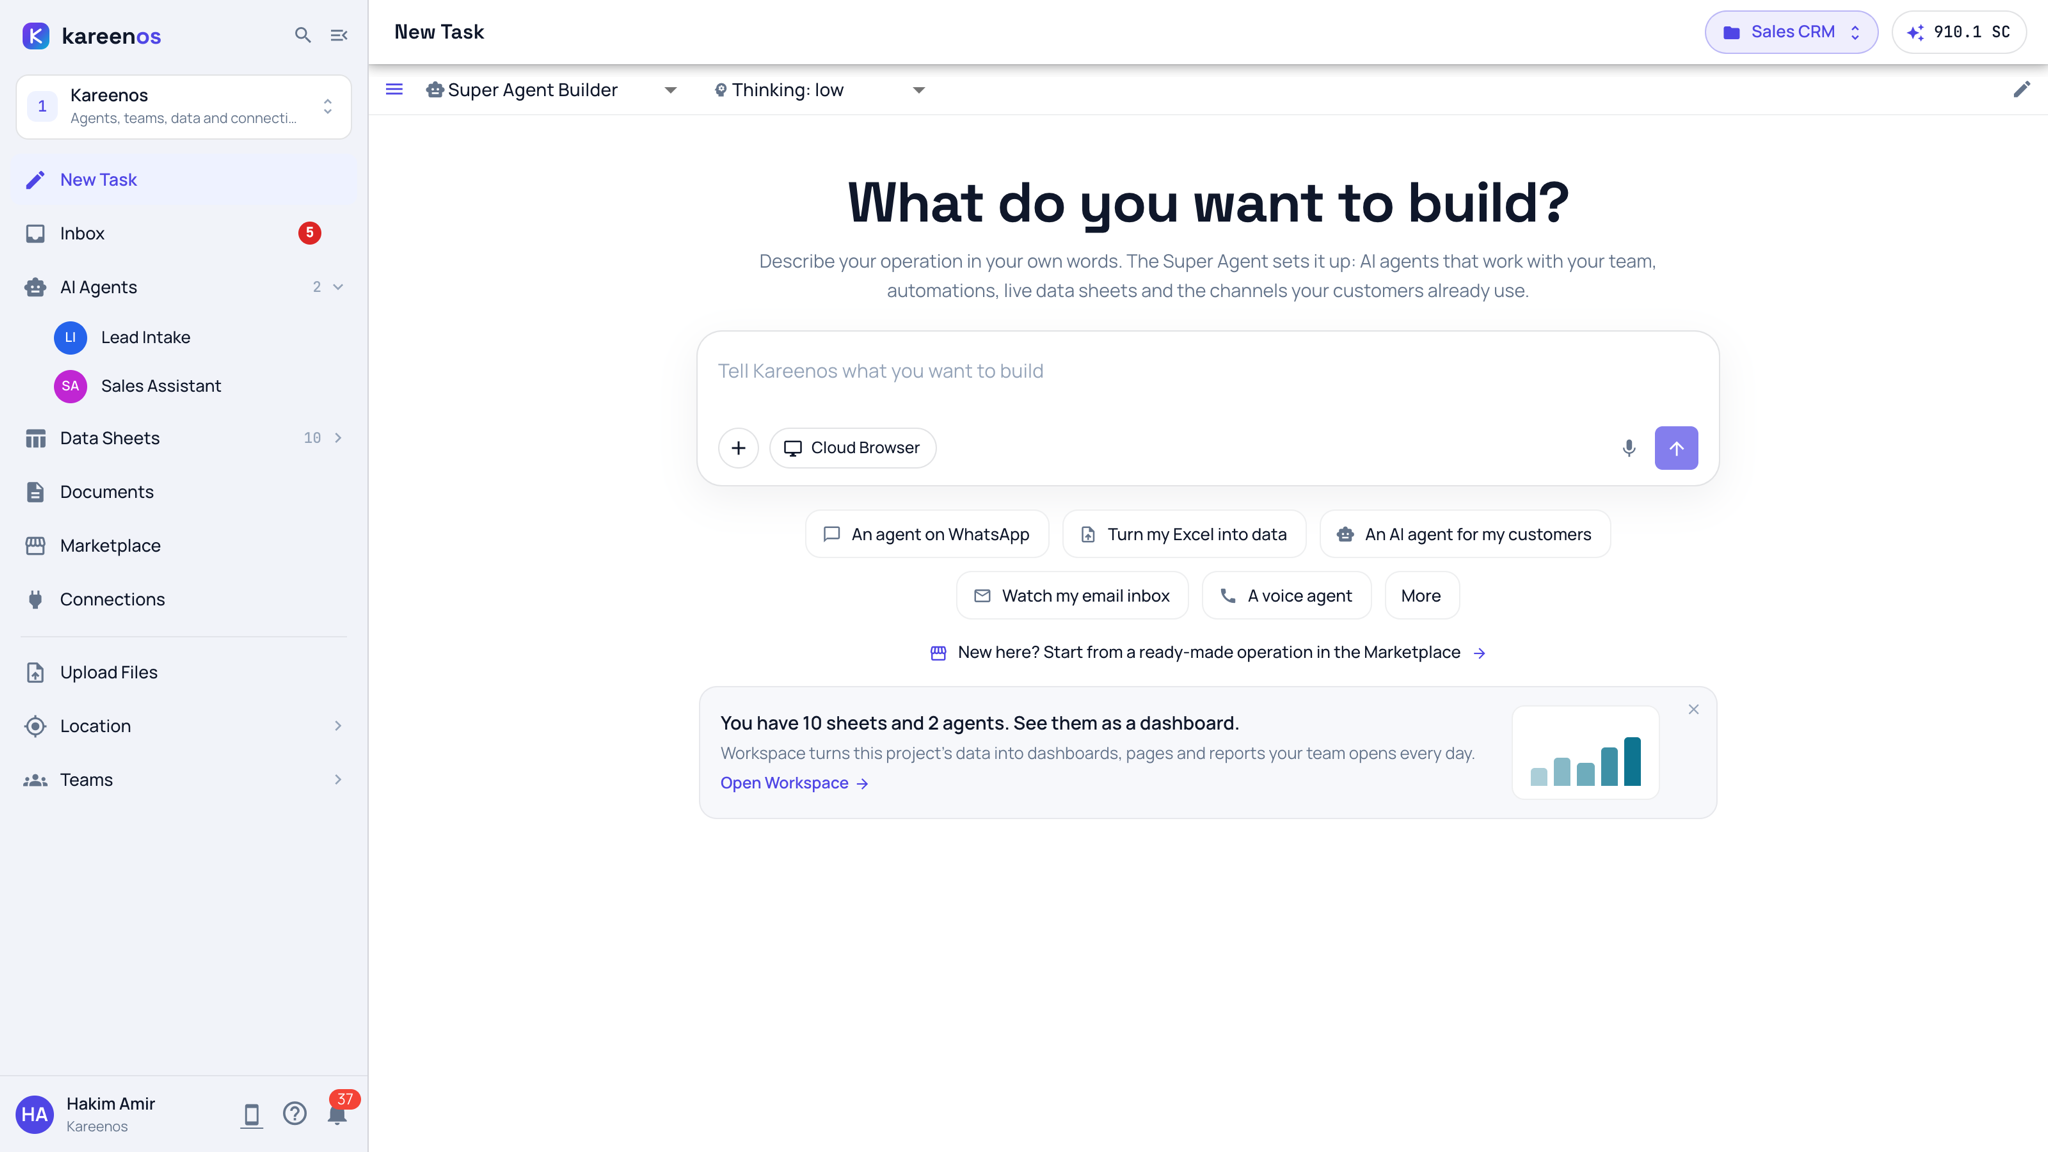
New Task is the first row of every level. At level 1 (Kareenos) its page asks "What do you want to build?". Press Open in Kareenos above. Anyone with builder access can give the Super Agent a task; if New Task is missing from your sidebar, ask your administrator to place you in a builder Team.
1. Choose or create the project
Everything the Super Agent builds goes into a project. For a new operation, let the Super Agent create it.
Click the project selector in the top bar.
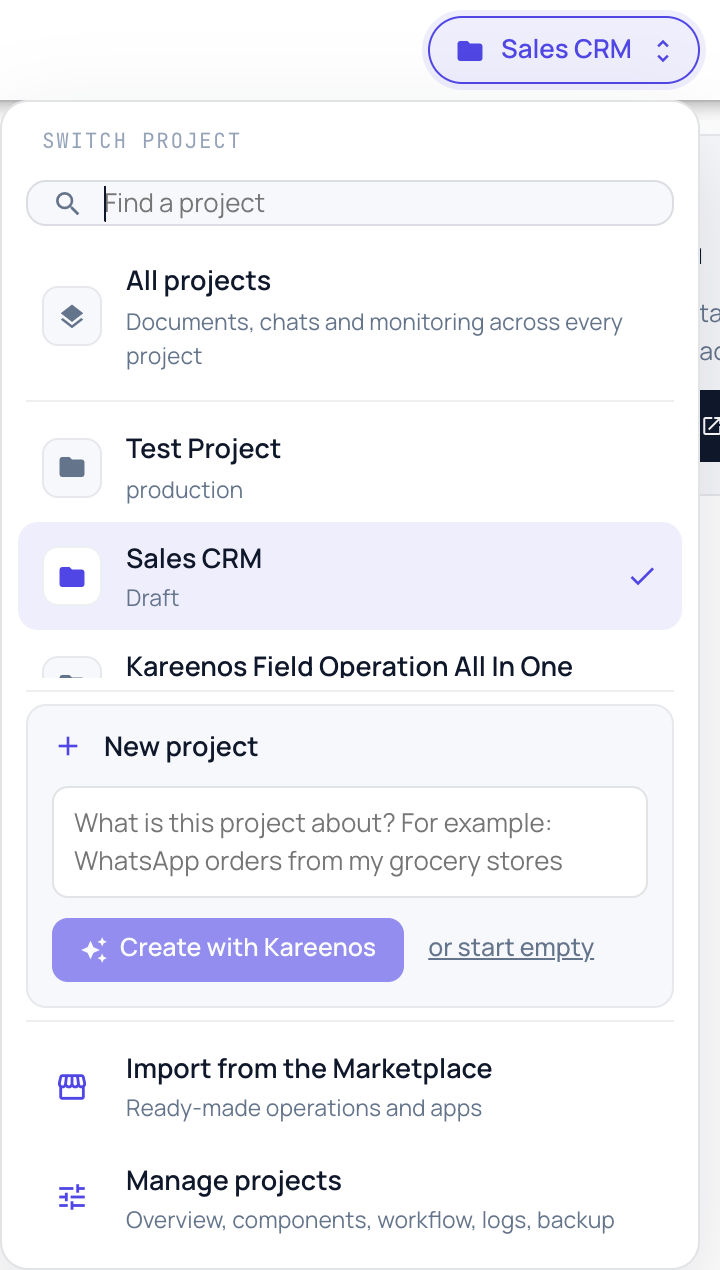
To start fresh, type one sentence in New project, for example "WhatsApp orders from my grocery stores", and press Create with Kareenos.
New Task opens in a fresh chat with your sentence already in the task box, and the selector switches to All projects. Add as much detail as you like (step 2 shows what helps), then send. The Super Agent proposes the project's name and description in its plan and creates the project when you approve.
To build into a project you already have, pick it in the list instead and open New Task.
2. Describe the operation
Type your description in the task box, or press one of the example chips under it to start from a ready sentence. The + attaches a file (a spreadsheet, a price list, a photo), the microphone lets you dictate, and the arrow sends.
A good description sounds like this:
We are a maintenance company with 12 technicians. Jobs come in from customers all day on WhatsApp and technicians receive their daily work on their phones. We need to track tickets and technicians, warn me when a job is late, and send me a summary every Monday.
That single paragraph is enough to start.
Tip
Describe what your business does and what should happen. Do not describe software features. "Customers ask for a quote on WhatsApp and someone has to approve it before we book it" is far more useful than "I need a chatbot with an approval workflow".
3. Answer the interview
The Super Agent replies with one consolidated form of multiple-choice questions, not a long back-and-forth chat. It covers what the operation is for, the people involved and their roles, where your data comes from, what should run automatically and how often, whether anything moves (people, vehicles, equipment), which channels your customers use, and who on your team should be asked to approve or act.
Every question offers a (Recommended) option, so "go with your recommendations" is a complete and valid answer. You can also type free text instead of picking options. Expect at most one short follow-up round.
4. Approve the plan
You then get a readable plan: the mission in your own terms, everything it will build, anything it will reuse from what you already have, how the parts connect, and the order it will build them in. Read it and approve once. This is the only approval the build needs.
5. Watch it build
From that single approval it works through the plan without stopping to re-ask you. A plan panel opens beside the chat with two tabs: Plan shows the plan, and Todo shows every build step with its live status and a done/total badge. You can leave the page and come back; your past chats are in the history panel, opened with the menu button at the top left of the chat.
It creates the agents, the data sheets, the automations, the forms people answer in their Inbox, and the wiring between them, then finishes with a check of what exists against what the plan promised.
6. Finish the parts only a person can do
When the build reports finished, a few things still need you, and the first day checklist walks through them: approve the automations, connect your channels, add any credentials, invite your team.
Note
Approving automations is deliberate. It is the moment a person reviews exactly what a piece of automation is allowed to do before it runs, and it cannot be skipped or done by an agent.
7. Keep building in the same box
Everything after the first build starts in New Task too: a new agent, another automation, a change to the morning message. For something to look at, a dashboard or a page, open New Task at level 2, where it asks "What do you want to see?". New Task lists what you can ask for, with examples.